To learn how to use OneSchool Reporting Helper, go to this previous post. This is a guide to first-time setup.
In my
previous post, I introduced
OneSchool Reporting Helper; a tool to help streamline reporting in OneSchool. If you don't use OneSchool for Reporting it may be possible to make minor adjustments to the
source code to suit your reporting infrastructure. However, even if you do use OneSchool, the Reporting helper still needs some configuration the first time it's run. This configuration only needs to be done once. It's not hard, but if you've never heard of HTML you'll probably want a hand from your school's IT pro. With the initial set-up complete you can then distribute the settings to the rest of the teachers in your school.
In total, to set-up the program we need to do two things:
- Locate the HTML ID of all the controls in OneSchool we want to interact with
- Create a matrix of reporting options to fill in those controls.
Here's the whole process step by step:
1) When you first run the Reporting Helper, it will warn you that it doesn't have a settings file. This is normal; we haven't built one yet.
2a) The Reporting Helper will open up OneSchool in its own browser but we first need to point it to that URL. Click Setup > OneSchool URL
2b) Copy the URL for the OneSchool Login into the dialog box and click apply.
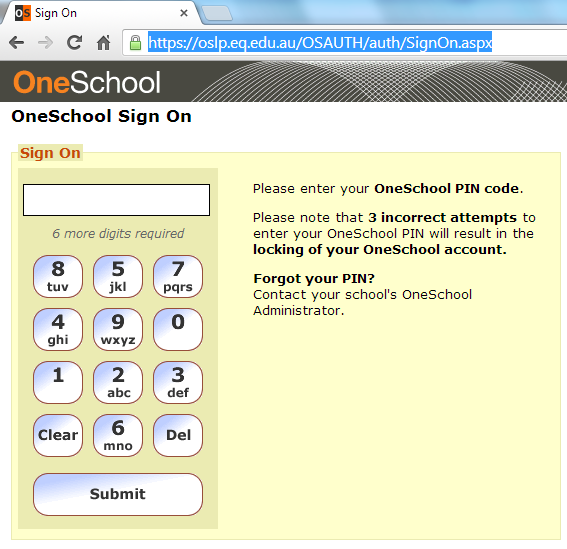 |
| Copy this URL... |
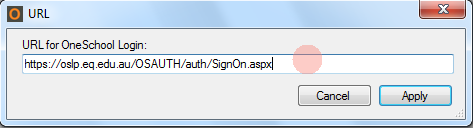 |
| ...into this dialog box. |
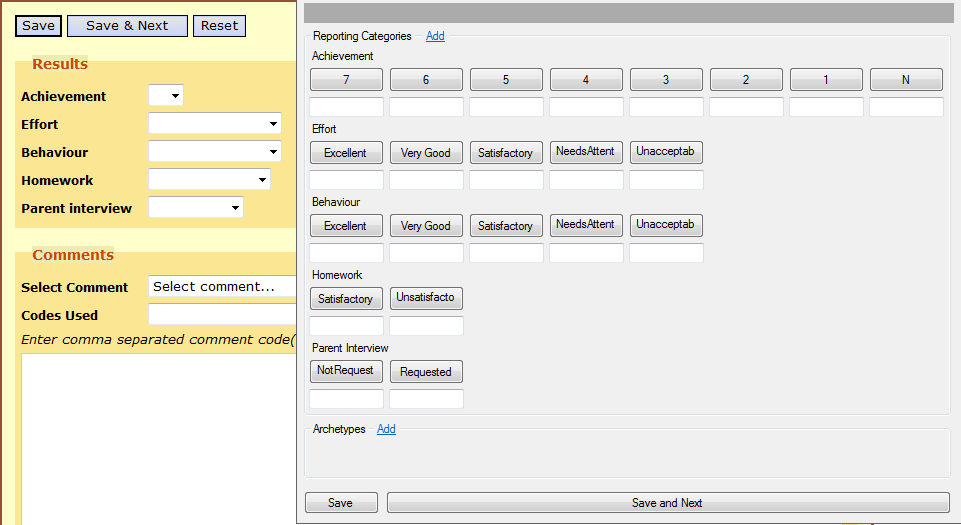
3a) Next we need to start locating the HTML IDs of the controls we're going to interact with. At the moment we don't have any buttons to do our reporting with. We also need to set up the Save and Save and Next buttons because they also interact with HTML controls. That's what we'll do first
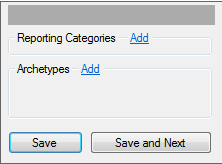 |
| No reporting buttons are set up yet. |
3b) Open up OneSchool in your favorite browser (Chrome, Firefox, IE, but NOT in the Reporting Helper) and navigate to your reporting page. This is where you would normally enter data for your students. Right-click somewhere empty on the form and click "view page source".
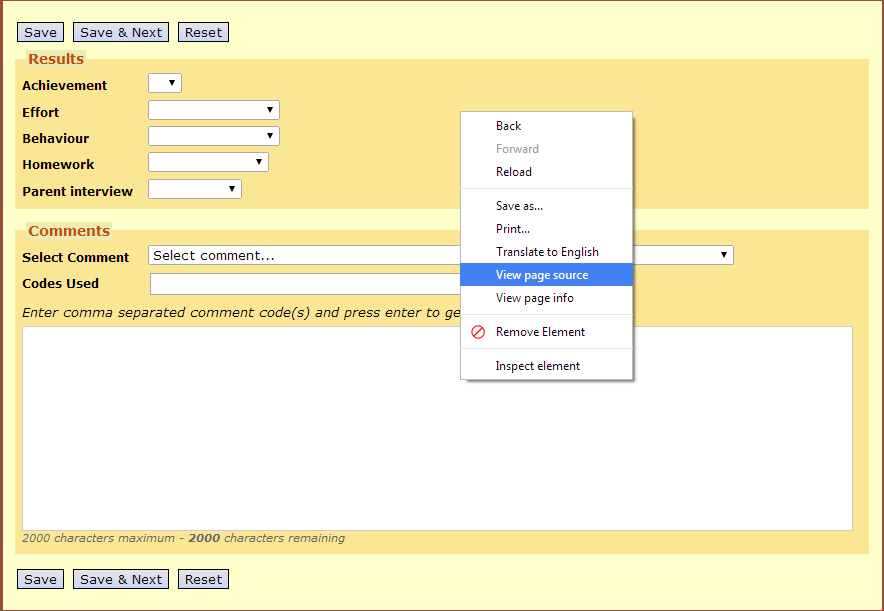 |
| This image was captured in Chrome. If you have a different browser you might need to look up how to view a web page's source code with that browser |
3c) First, let's find the HTML ID for the "Save" button and copy it. It looks like this:
 |
| Copy the HTML ID for the "Save" button |
3d) Then we need to right-click on the save button in the Reporting Helper, and paste the HTML ID into the dialog box and click apply
|
| Right Click on "Save" then... |
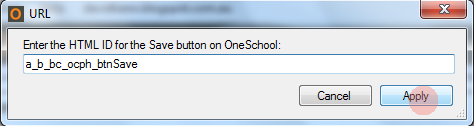 |
| ...paste the HTML ID into the dialog box. |
3e) We'll do the same thing for the Save and Next button. Find the HTML ID, right-click on "Save and Next", then paste into the dialog box and click apply.
 |
| Copy the HTML ID for the "Save and Next" Control |
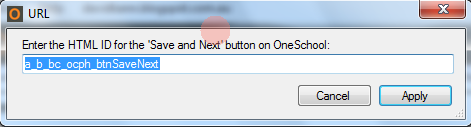 |
| Right Click on the "Save and Next" button and this dialog will appear. Paste in the HTML ID and click Apply |
4a) Now it's time to set up the HTML ID for the comment box. In the HTML Source, locate the HTML ID for the comment box, and copy it.
4b) In the Reporting Helper, click Setup > Comment Box HTML ID and a dialog box will appear. Paste the Comment Box's HTML ID into the dialog box and click apply
5a) Now it's time to start adding reporting buttons. In the Reporting Categories toolbox, click the text that says "Add". A window will appear. Select Row 1 from the window.
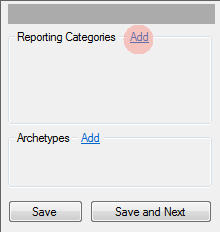 |
| Click "Add" next to "Reporting Categories" |
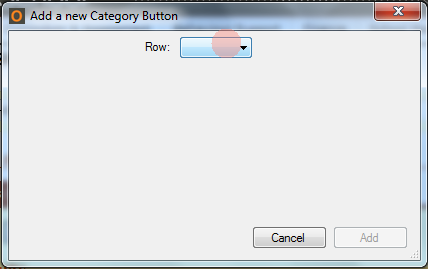 |
| In the drop-down menu for row, select row 1. |
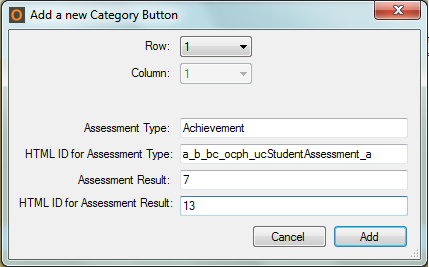
5b) This will cause a number of new options to appear in the window. Here is where we will set-up the reporting options. Since this is the first row of reporting options we'll map it to the first reporting criteria, "Achievement". You first reporting criteria may be different so you might type something else under "Assessment Type". My top result for Achievement is a "7", so this button's "Assessment Result" will be 7.
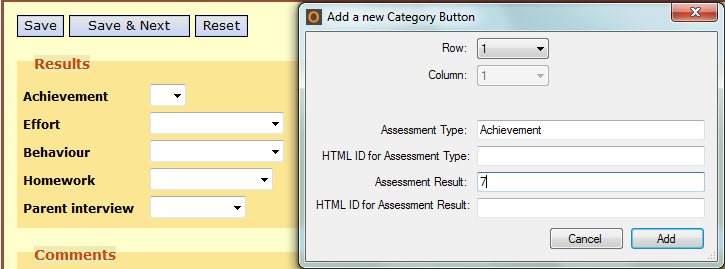 |
| Your Reporting is probably different to mine so you will enter whatever it is that you report on. I report on "Achievement", and it's a scale from 7 to 1. |
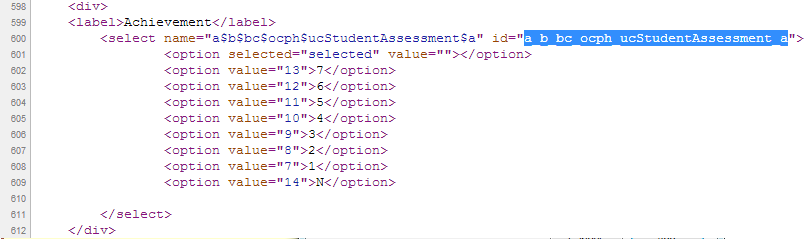
5c) We want this button to report 7 for Achievement but to do that we need the HTML ID of the Achievement drop-down menu. Going back to the source code, we'll copy the HTML ID for the Achievement drop-down menu and paste it into the "HTML ID for Assessment Type" box.
 |
| Copy the HTML ID... |
 |
| ...and Paste. |
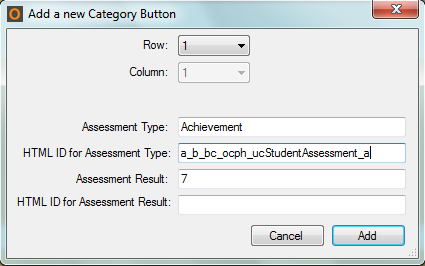
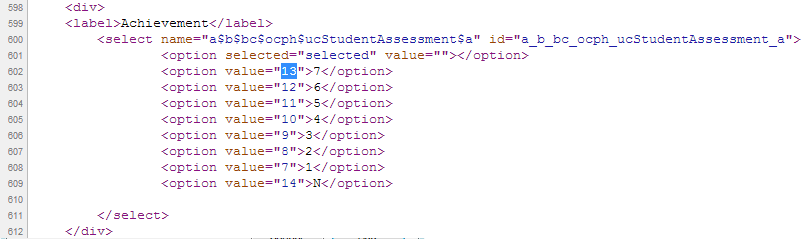
5d) The last field is the HTML Value for a 7. Looking at the same section in the source code, we get the HTML Value for a 7. Copy this and paste it into "HTML ID for Assessment Result":
 |
| Copy the HTML Value... |
 |
| ...and paste |
5e) Click "Add" and the button we configured will be added to the Reporting Categories Toolbox:
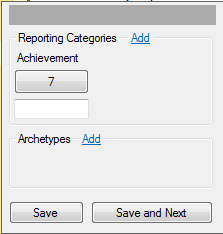 |
| This new button will insert "7" into the "Achievement" report. |
6) Follow the same process in steps 5a-5e to create buttons for all the reporting results in this reporting type:
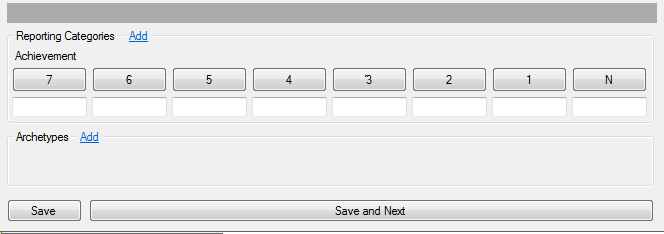 |
| In my case, Achievement is graded on a 7 to 1 scale, with and additional N for "No Record". Your Reporting may look different. |
7) Next we need to go through the same process in steps 5a-6 to add another row of buttons for our next Assessment type. In my case, that's "Effort". I found the HTML ID for effort, and filled in buttons for all the Effort Results:
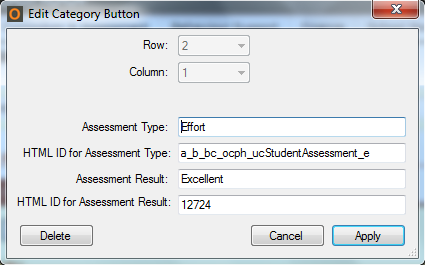 |
| This Assessment Type is next on the list after Achievement so it's in Row 2. |
8) Continuing this pattern, we can fill in buttons for all the Assessment Types and Results:
 |
| Every Option for Achievement, Effort, Behaviour, Homework, and Parent Interview have buttons associated with them now. |
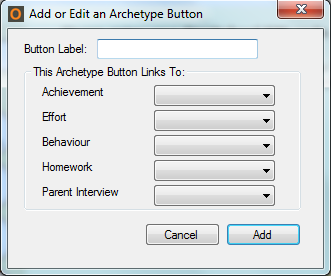
9a) The final step is to create some Archetype Buttons. The user will configure the Archetype buttons to their needs but it's a good idea to get a few default ones set up. Click on the text "Add" next to "Archetypes:
9b) This window will appear. We're going to create generic archetypes, so basically Excellent down to Unsatisfactory. This first Archetype button will be "Excellent" so type that into the Button Label, and select the highest reporting results from each reporting type's drop-down box.
 |
| The blank window pops up... |
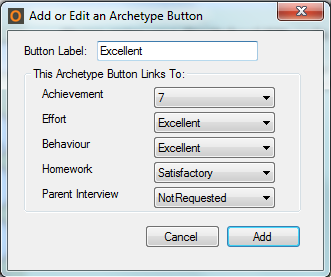 |
| ...And choose options from each Reporting Type |
9b) Click "Add", an the Archetype button will be added to the Archetype Toolbox. Repeat step 9a to create a small variety of different Archetypes.
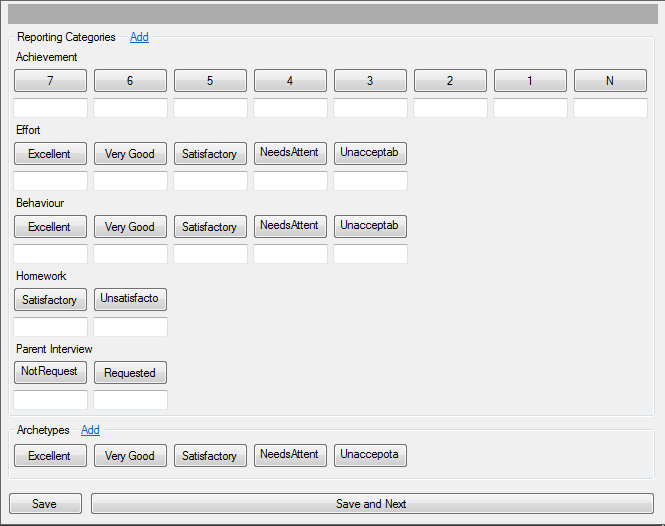 |
| I chose to make 5 generic Archetypes: Excellent, Very Good, Satisfactory, Needs Attention, and Unacceptable |
10) At this point you're done. Close the program and it will automatically save its settings in the same directory as the executable as "settings.txt". You can then distribute the executable with the settings file to other teachers at your school and they won't have to go through this setup process. You may want to direct them to this
guide to using OneSchool Reporting Helper, though.
Download the program
here, or the source code
here. Cheers!


No comments:
Post a Comment